The best camera is the one that’s with you.
Right now, social distancing due to COVID-19 means that many of you have limited access to film equipment, but there are many situations where it’s necessary to improvise with whatever equipment is available.
Some of you do not have access to a DSLR; this is not a problem! Some of the most influential movies in the history of cinema remain those that were made using a wood box with a crank on the side. Great movies have been shot with a consumer camcorders and phones. This guide is designed to help you get the most out of those devices, to gain manual control over them to the extent possible, and to think about the assets and advantages of these idiosyncratic cameras rather than their limitations.
Smartphones
If your phone was made in the last 3–4 years, it has a remarkably high-quality camera, even by digital cinema standards. The problem with phone cameras is that they are designed to be completely automatic—to make all the decisions of focus and exposure for you. We know that this is a bad idea! But there are ways to exercise more control over your built-in camera.
iPhone
I’m using an iPhone XS with iOS 13, and its available settings may differ from your phone. But they should be similar enough that you can follow along—iPhones have had very good cameras for the last 10 years, so the odds are that if you have an iPhone, you can shoot sharp, vivid, eminently usable video with it.
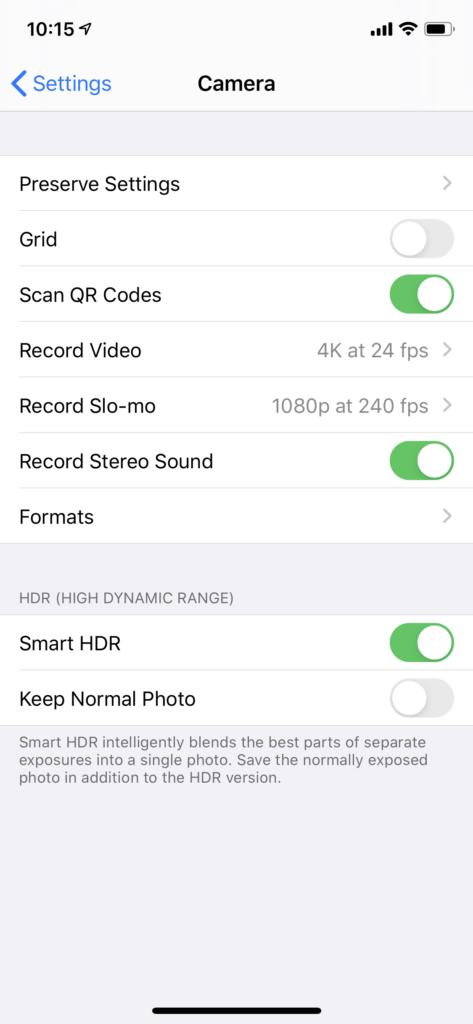
Before we do anything else, take a trip to your settings, and scroll down until you see “Camera.” Now, take a look at the “Record Video” submenu.
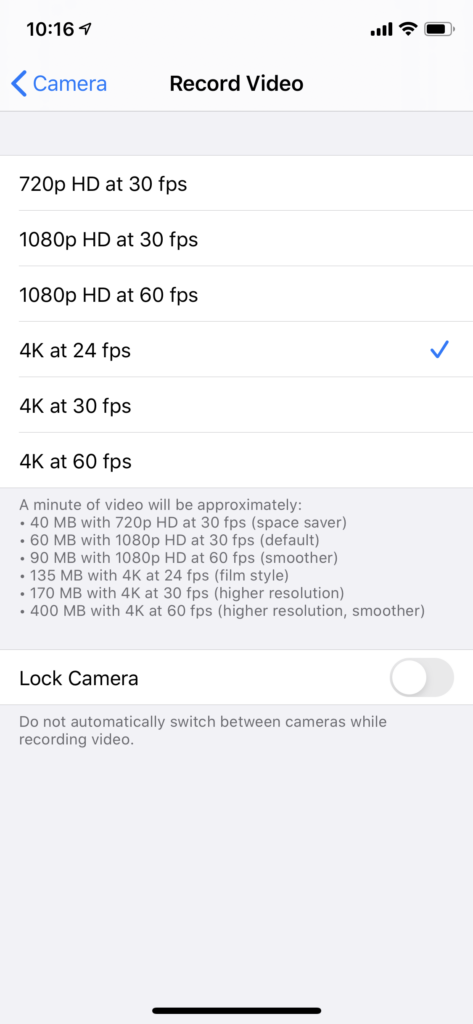
This lists the available frame rates and resolutions for shooting video with the native camera app. You can see I have mine set to 4K/24p because it’s the only 24 fps option my phone supports, but should I need to, I can go down to 720p/30 or all the way up to 4K/60p.
My camera can record slow-motion video, up to 240fps! I haven’t played with this much, but it provides some interesting possibilities.
Under the “Formats” submenu, I can choose between the “High Efficiency” codec (HEVC) or the “Most Compatible” codec (H.264). I’ve successfully edited HEVC footage in Premiere and DaVinci Resolve on my Mac, but if you’re editing on a Windows machine, you may want to switch this to “Most Compatible” to avoid compatibility problems.
Taking video
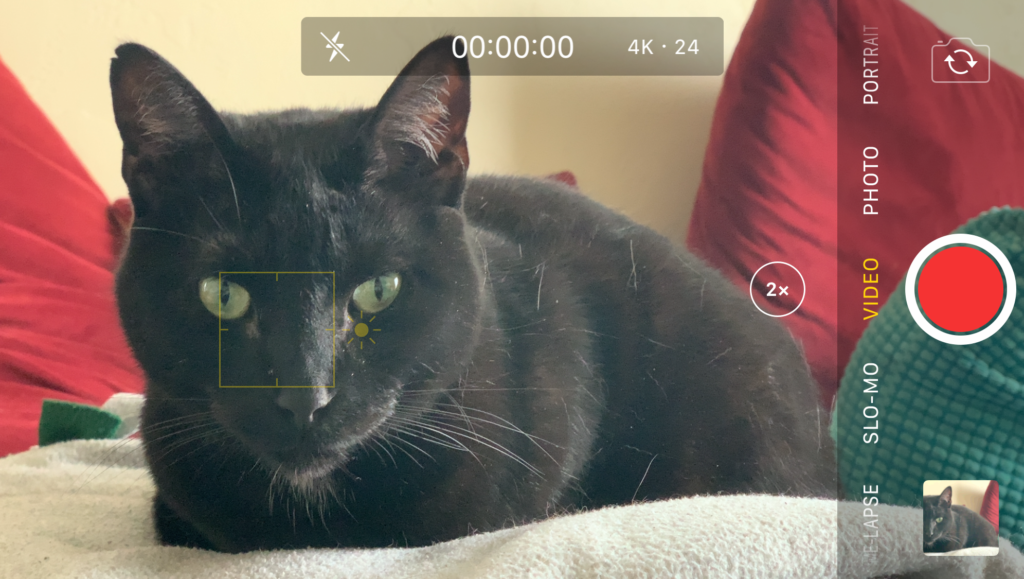
The built-in iPhone camera app is very simple, but it does allow some semi-manual controls, using a tap-to-focus interface.
Open up the camera app. To get into video mode, swipe left until “VIDEO” is highlighted in yellow.
Tap and hold on the part of the image you want to focus on until the message “AE/AF LOCK” appears on screen, then tap and drag up and down to adjust the exposure.
I haven’t found a way to adjust white balance in the native app, so you’re kind of stuck with whatever the auto white balance gives you. Remember that if it’s close, you can use Premiere or Resolve to dial in the appropriate color settings.
Once you have your frame/focus/exposure set, push the red circle button to start recording. Push the red square to stop.
Transferring files to your computer

If you have a Mac, the easiest way to transfer files is probably to AirDrop them to yourself. Make sure you have AirDrop enabled on your computer and your phone, then open up the “Photos” app on your phone. Open the clip you want to transfer, tap the share button on the bottom left, and then tap the AirDrop icon. You should then be able to select your computer—you may need to approve the transfer from your computer—and then the file will transfer to your Downloads folder.
If you have a Windows machine or can’t use AirDrop, you can also transfer files via USB, but the process is a little more complicated.
Once you get the video files on your computer, you can edit them in Premiere or your editing software of choice. Remember to use appropriate file structure!
Android phone
I don’t have an Android handy to walk through this in detail (and processes will vary based on the make of your phone), but the shooting process should be similar to the instructions for iPhone.
Transferring files to your computer
You can transfer files from your phone to your Windows or Mac computer over USB using the free Android File Transfer app. You may need to do a little digging in the folder structure to find your videos; if you use a third-party app like Filmic Pro, the videos will save inside the folder for that app.
Shoot horizontal video
Unless you have a very specific reason to shoot vertical video, turn your phone sideways to shoot in standard widescreen format.
Avoid using the selfie camera
The front-facing camera on your phone is lower resolution, and sometimes does not offer as many manual controls. Avoid it unless absolutely necessary.
Take advantage of different lens lengths, if you have them
My iPhone’s standard camera is pretty wide-angle for filmmaking purposes (equivalent to a 26mm lens on a DSLR), but I have a second telephoto lens that’s equivalent to a 52mm lens, which renders close-ups much more naturally. In my stock camera app, I just tap the “1x” button to switch to telephoto mode.
For this example, I stayed in the same place and took two different shots: one with my default lens, one with my telephoto lens, to demonstrate the magnification:
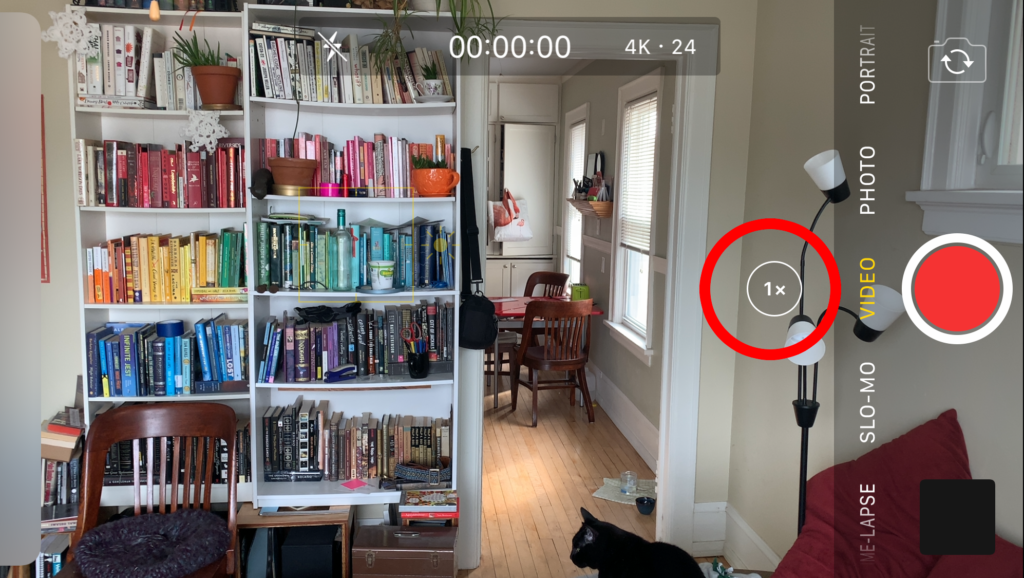
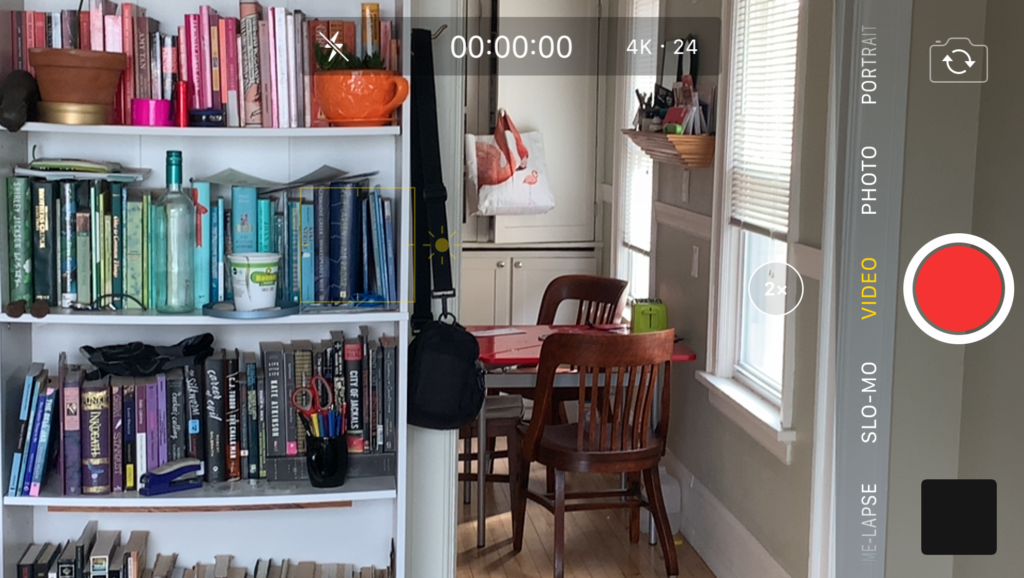
Using telephoto lenses to change perspective

Your camera may also have a super-wide-angle lens for extreme wide-angle wackiness! Worth experimenting with, if you have the option!
Full manual control: Filmic Pro
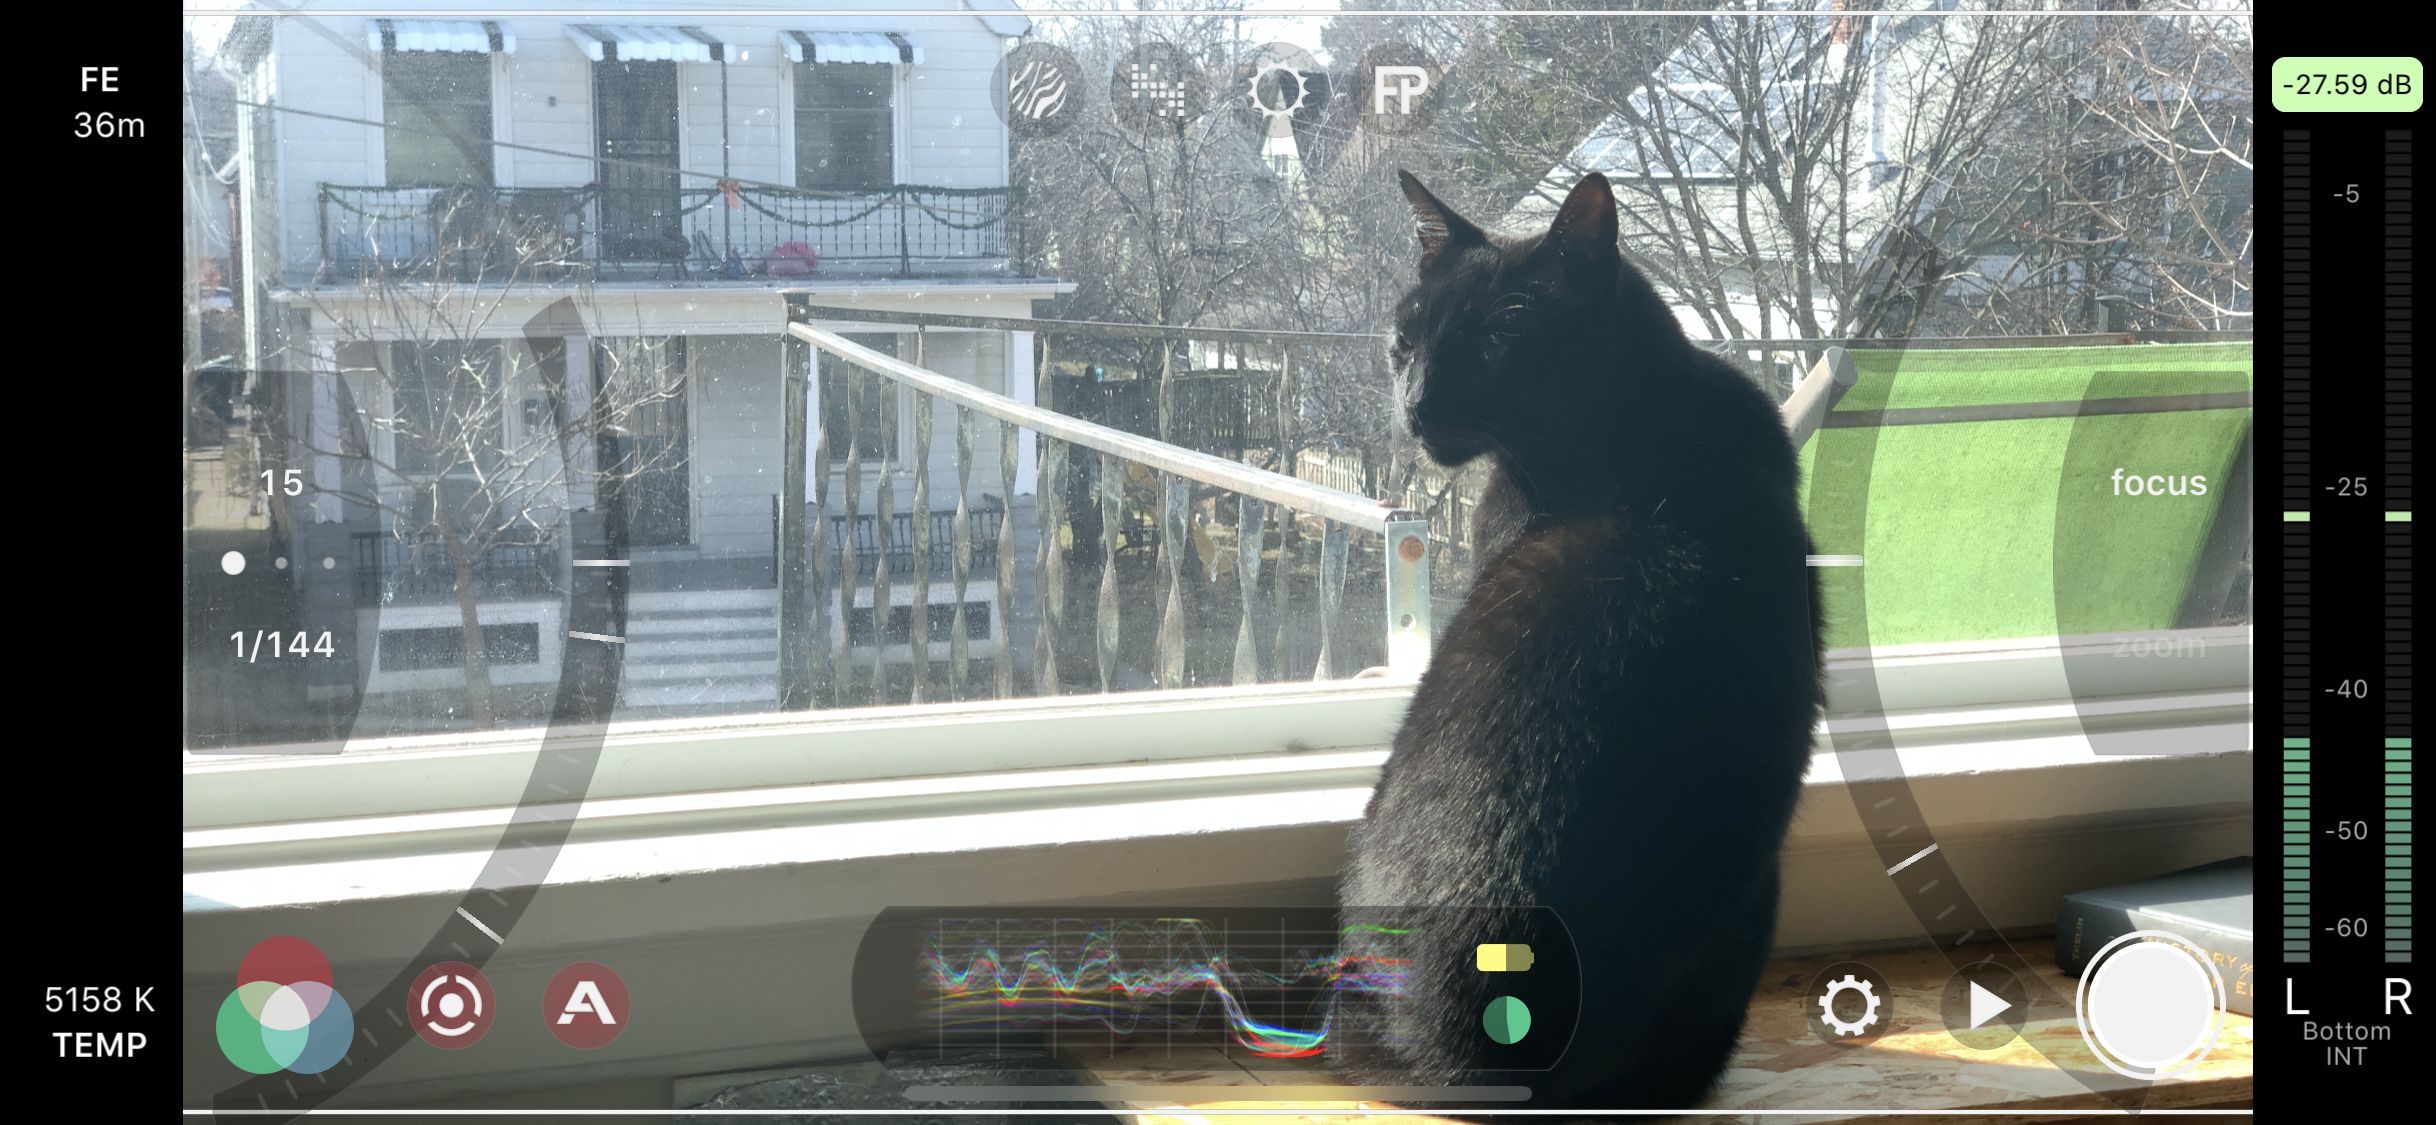
If you’re willing to spend a few bucks ($15, which is steep for a phone app, but I’ve found is worth it), Filmic Pro, available for both Android and iOS, gives you manual control over your exposure (ISO and shutter speed only; phones don’t have a variable aperture), white balance, audio levels, even your resolution and frame rate. If you want your phone to behave like a digital cinema camera, this is the best available option.
I’m not going to include a guide here because there’s just so much in the app, but it’s well documented on their website: Support page | Quick start guide | User manual | Tutorial videos
Camcorder
If you happen to have access to a camcorder (e.g. a Sony Handycam or similar) that shoots digital video, don’t underestimate its capabilities! Most new-ish camcorders have good sensors, excellent lenses with variable apertures, and may feature optical image stabilization and full manual exposure.
If you want to shoot with a camcorder, your first step should be to find the manual. (Most manufacturers make their manuals available online; Google your camera’s make and model and you’ll probably find something).
You’ll want to find out how to:
- Adjust your frame rate and resolution
If you can, avoid shooting in an interlaced format like 1080i or 480i. A progressive format like 1080p/720p will be far easier to edit.
- Manually control your exposure
Some cameras may combine everything into a single “exposure” control, but if you’re lucky, your camera will give you individual control over shutter speed, aperture, and ISO/gain.
- Manually control your focus
- Manually set your white balance
- Disable “digital zoom” functionality
Digital zoom artificially enlarges your image, producing pixelation, aliasing, and other unfortunate artifacts. Disable it if you can.
Webcam
If all else fails, you have a camera in your laptop that you can use to record video. These cameras only allow for automatic exposure and white balance, and are often calibrated to focus only on subjects about 2–3 feet away. Because of this, they are extraordinarily limited. Kind of exciting, isn’t it? What can you make under such strict limitations? How can you subvert your webcam’s intended purpose?
Recording from your webcam: Mac OS
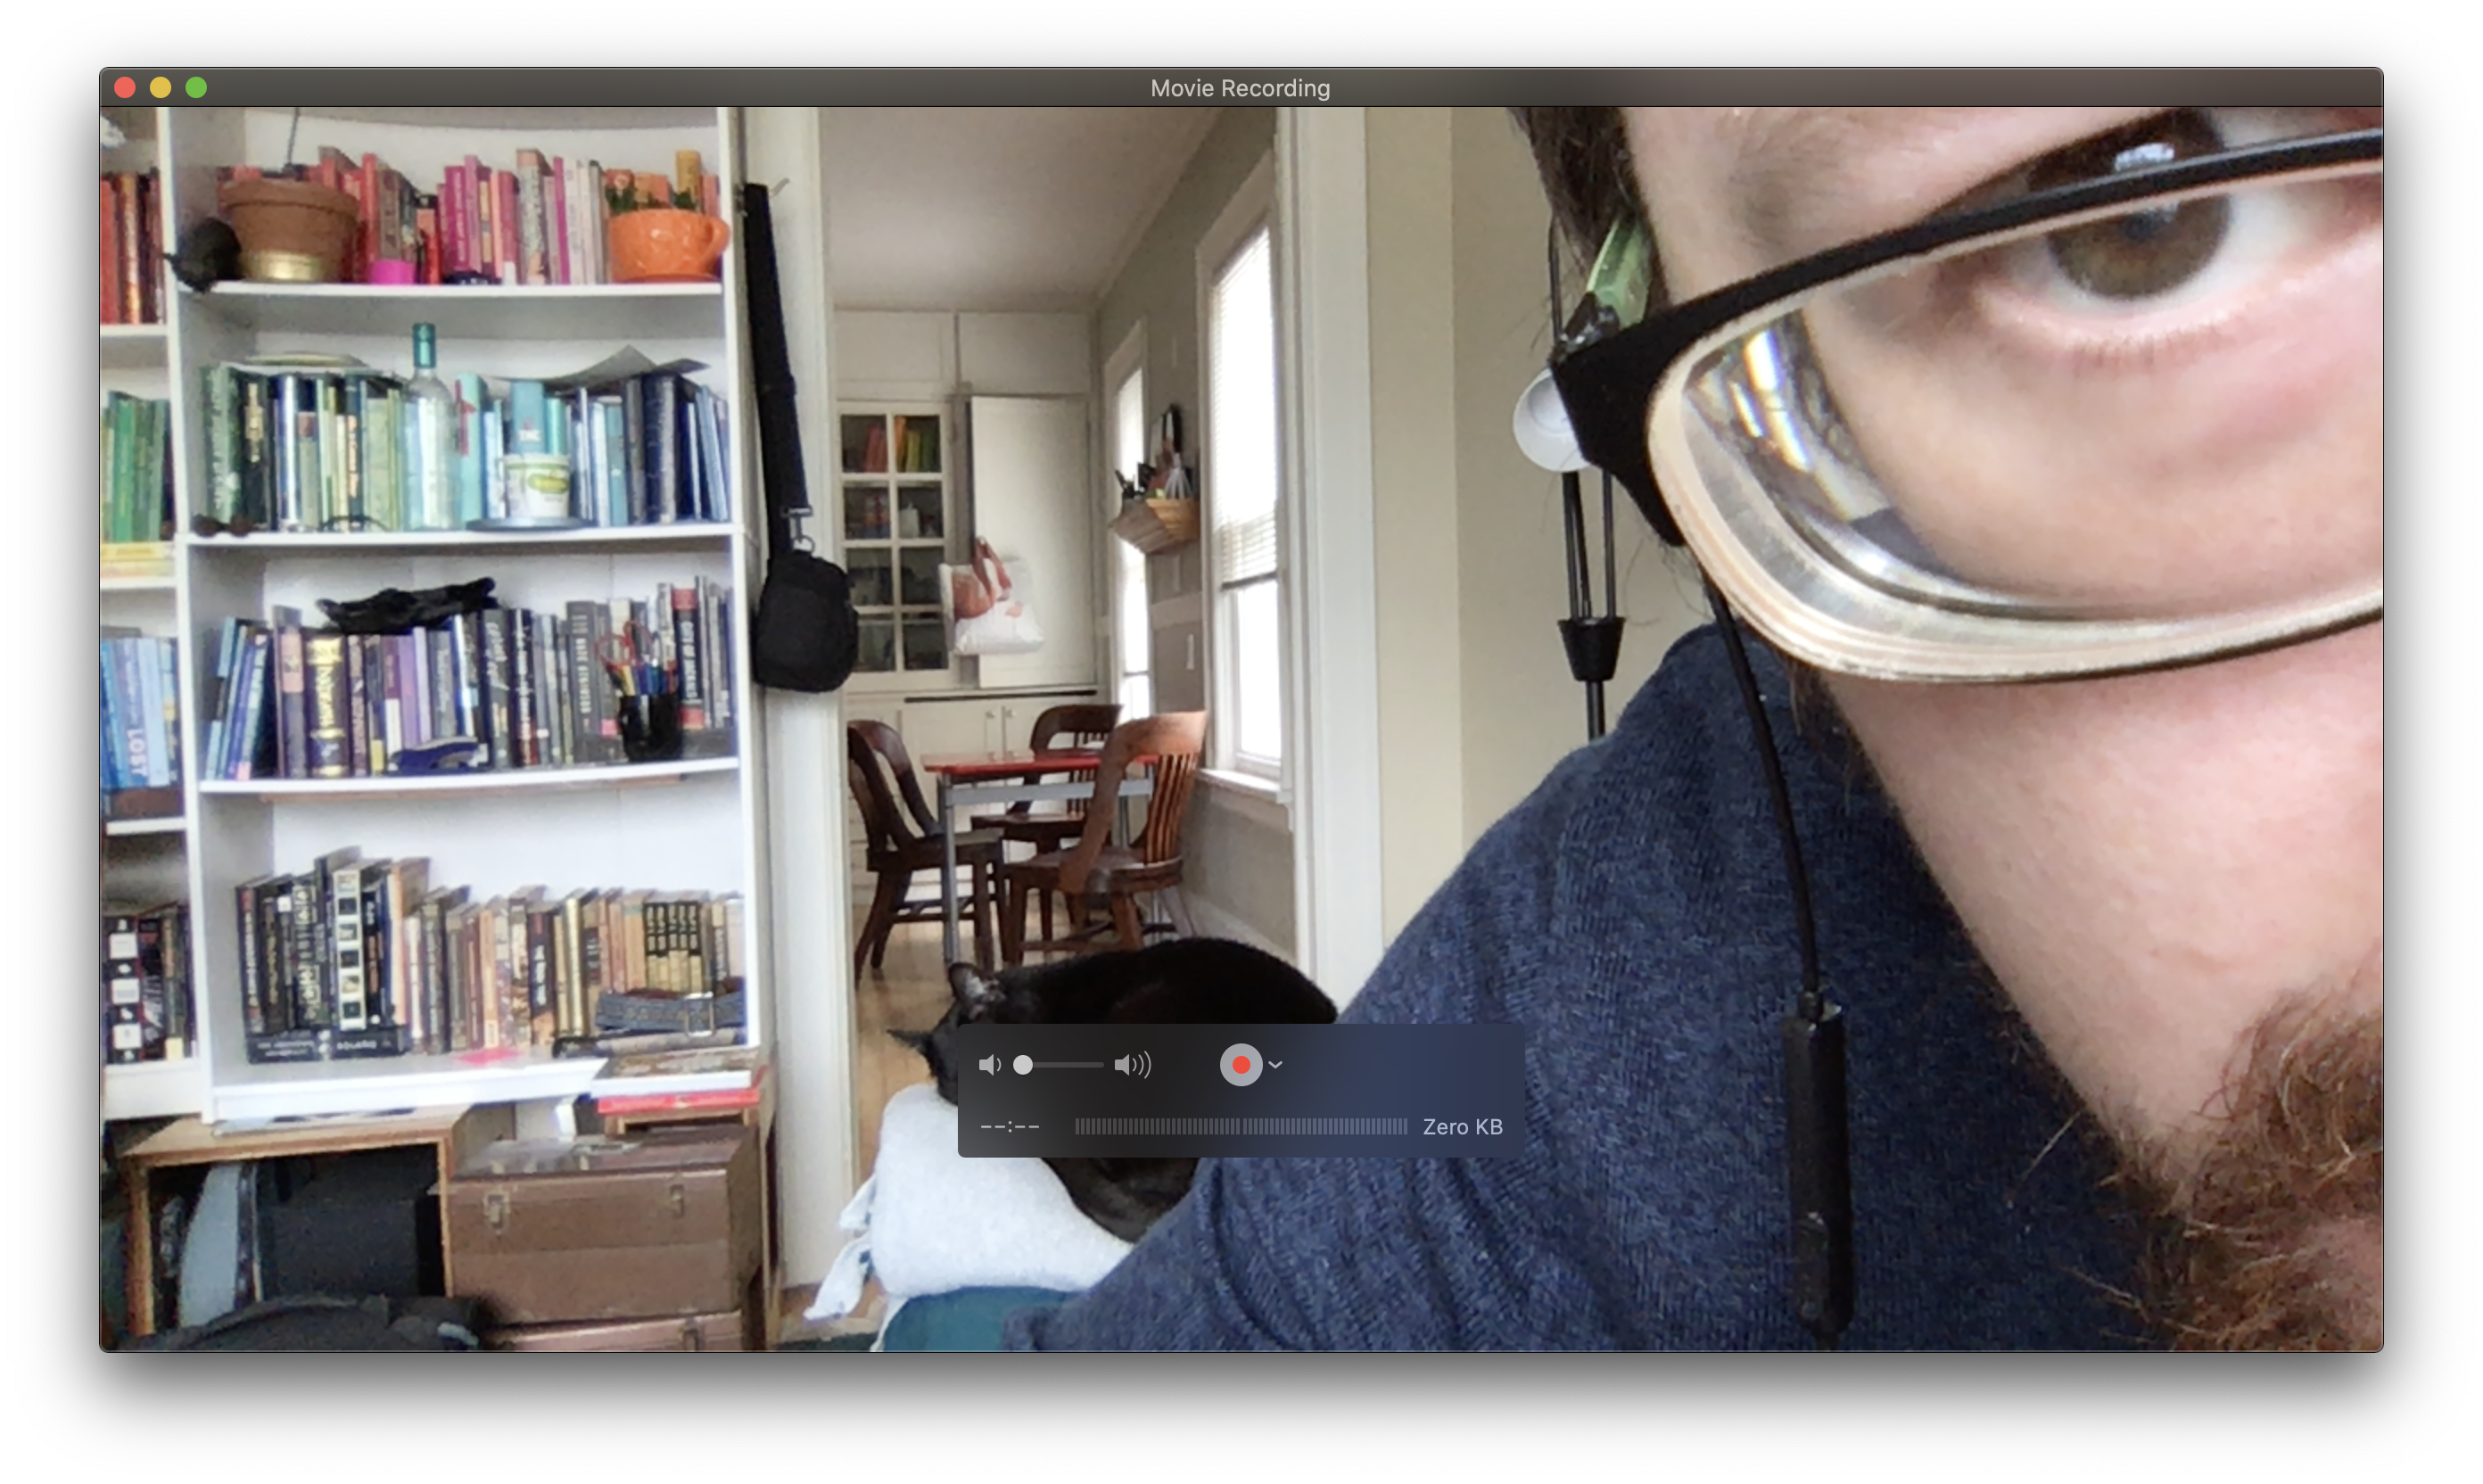
You may be tempted to use Photo Booth, but there is a better way! Open the QuickTime Player application and select File > New Movie Recording.
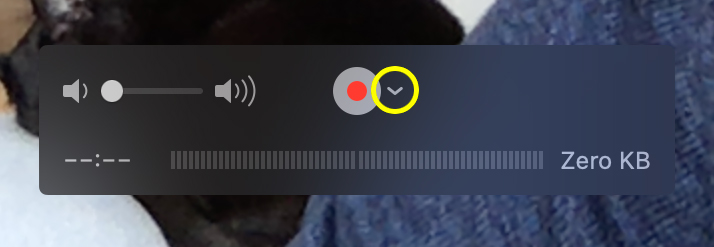
A window will pop up that shows you a live preview of your webcam. Click the little down arrow next to the record button and make sure that the quality is set to “Maximum.”
You may notice that the image gets a little flickery if the framing or lighting changes. If your exposure is too light or too dark, try nudging around the frame a little bit to get the auto exposure to change to something more desirable.
Click the red circle to start recording; click it again to stop.
Once you’ve stopped the recording, you can review it. If you like it, select File > Save to save the recording to a QuickTime file. Again, be sure to follow proper folder hierarchy!
According to my experiments using a MacBook Pro running OS 10.15, this produces 720p ProRes 422 video files with a 16kHz mono audio track and the truly infuriating frame rate of 29.1 fps. But it’s a video, it looks pretty good, and Premiere can edit it!
Recording from your webcam: Windows 10
You can record video from your webcam on Windows 10 using the Camera app. I don’t have a Windows machine handy to test this out, but here’s a tutorial.
Recording Sound
The voice memos app on your phone is a great way to record audio if you have no other choice. The only shortcoming is that I haven’t been able to find any audio recording app for iOS or Android that allows for manual gain control, so you’ll have to make do with auto levels.
As with any other microphone, the most important thing is to get your microphone as close to the audio source as possible. If you’re recording voiceover, that’s easy! Just hold up your phone and talk directly into the microphone (from a few inches away, to avoid plosives/mouth noises).
But you can also use a phone the way we talked about using a dedicated audio recorder, to record sync sound! This is great if your camera is far away but you still want to record clean dialogue—conceal your phone somewhere just out of shot and start recording, then start your camera and clap your hands to provide a reference point so that you can synchronize audio and video once you import the files into Premiere.
Advanced recording/editing on your phone
iOS: Though primarily designed for music, GarageBand gives you some more advanced controls for voice recording, audio processing, and multitrack editing, and may produce better-quality recordings than the stock Voice Memos app.
Android: Auphonic Edit is a great audio recording and editing app.
Editing video
Adobe Creative Cloud
Adobe offers educational discounts on Creative Cloud subscriptions.
DaVinci Resolve
If you prefer a different editing experience, DaVinci Resolve is a free, full-featured editing program for Windows, Mac, and Linux. It’s a little tricky to pick up if you’re familiar with Premiere (and it may not run on older or lower-specced computers), but it’s a very rewarding way to edit once you’ve learned how!
Editing video on your phone
Compared to editing on a computer, editing video on the tiny touchscreen of a phone or tablet can be a pretty frustrating experience. But it is possible!
iMovie
If you’re using an iPhone, Apple’s free iMovie app for iOS is quite full-featured, and should allow you to do even moderately-complex edits on your phone. Here’s a detailed tutorial.
Once your edit is done (tap “Done” at the top left), you can tap the share button and select “Save Video” to export a QuickTime video file that you can then transfer to your computer or upload to a video sharing site like YouTube or Vimeo.
Premiere Rush
Adobe’s free Premiere Rush app for iOS and Android allows you to edit video and export videos, although it limits you to three exports unless you have a Creative Cloud subscription (not sure if the aforementioned student license works), or you can pay a $5 monthly fee for unlimited exports. Booooo.
Other considerations
Lighting
Just because you don’t have purpose-built film lights doesn’t mean you can’t control the lighting of your environment! You’ve got lamps… computer screens… the sun… here are some things to consider:
- Start by turning out all the lights. Usually, fluorescent or ceiling-mounted lights produce kind of ugly results.
- Move lamps around to achieve different lighting effects.
- Use white bedsheets or poster board to bounce/soften sunlight
- Flashlights can be surprisingly useful tools for adding a little light in a very specific spot.
Camera support
If you don’t have a tripod, think about other things you can mount your camera to. This is particularly easy and fun if you’re shooting on a smartphone! A little masking tape, some string, a couple rubber bands, etc. can help you attach your phone to a shelf, a chair… maybe the end of a broom handle, for a dramatic jib shot!
Cast
If you’re isolating with your family, I bet they’re incredibly bored. Recruit them to be your actors! If you’re on your own, think about interesting ways to shoot footage of yourself.
Think about social connections in this time of physical isolation. Can you tell a story that involves actors connecting via video chat? (In addition to recording your webcam, QuickTime Player can record your desktop)
Being forced to work entirely on your own can be very restricting, but it can also be freeing. I made this film, The Deposition of Lawrence Patterson, over the course of a few late nights many years ago, while everyone else in the house was asleep. Apart from a little lighting help from a friend one night I did all the production, acting and editing entirely on my own, using my Canon T2i and a few lamps I found around the house. The result is… unpolished, but it was also deeply satisfying to make.
This is all to say: be open to the creative possibilities of solitary work. Other modes of solo filmmaking could include:
- Manifesto films
- Personal essays
- Autofiction
- Telephone dramas
- Nonlinear self-deceptions
- Dream reenactments
- Mysteries of inanimate objects
- Video letters
- Imagined misdeeds
Give yourself permission to be less ambitious; to make work on a smaller scale. What is the smallest, simplest film you can make that still says what you want it to say?